Hiero
note
All the information also applies to Nuke Studio(NKS), but for simplicity we only refer to Hiero/NKS. The workflows are identical for both. We are supporting versions 11.0 and above.
OpenPype global tools
Hiero specific tools
Create Default Tags
This tool will recreate all necessary OpenPype tags needed for successful publishing. It is automatically ran at start of the Hiero/NKS. Use this tool to manually re-create all the tags if you accidentally delete them, or you want to reset them to default values.
Result
- Will create tags in Tags bin in case there were none
- Will set all tags to default values if they have been altered

Apply Colorspace Project
This tool will set any defined colorspace definition from OpenPype Settings / Project / Anatomy / Color Management and Output Formats / Hiero / Workfile to Hiero menu / Project / Edit Settings / Color Management tab
Result
- Define correct color management settings on project

Apply Colorspace Clips
This tool will set any defined colorspace definition from OpenPype Settings / Project / Anatomy / Color Management and Output Formats / Hiero / Colorspace on Inputs by regex detection to any matching clip's source path.
Result
- Set correct
Set Media Color Transformon each clip of active timeline if it matches defined expressions

Publishing Shots
With OpenPype, you can use Hiero/NKS as a starting point for creating a project's shots as assets from timeline clips with its hierarchycal parents like episodes, sequences, folders, and its child tasks. Most importantly it will create versions of plate subsets, with or without reference video. Publishig is naturally creating clip's thumbnails and assigns it to shot asset. Hiero is also publishing audio subset and various soft-effects either as retiming component as part of published plates or color-tranformations, that will be evailable later on for compositor artists to use either as viewport input-process or loaded nodes in graph editor.
Preparing timeline for conversion to instances
Because we don't support on-fly data conversion so in case of working with raw camera sources or some other formats which need to be converted for 2D/3D work. We suggest to convert those before and reconform the timeline. Before any clips in timeline could be converted to publishable instances we recommend following.
- Merge all tracks which supposed to be one and they are multiply only because of editor's style
- Rename tracks to follow basic structure > if only one layer then
mainin case of multiple layer (elements) for one shot thenmain, and other elements for example:bg,greenscreen,fg01,fg02,display01, etc. please avoid using [-/_.,%&*] or spaces. These names will be later used in subset name creation as{family}{trackName}so for example plateMain or plateFg01 - Define correct
Set Media Color Transformat all clips as those will be also published to metadata and used for later loading with correct color transformation. - Reviewable video material which you wish to be used as preview videos on any supported Projec manager platform (Ftrack) has to be added ideally to track named review. This can be offline edit used as reference video for 2D/3D artists. This video material can be edited to fit length of main timeline track or it cand be one long video clip under all clips in main track, because OpenPype will trim this to appropriate length with use of FFMPEG. Please be avare we only support MP4(h264) or JPG sequence at the moment.

Converting timeline clips to instances
Every clip on timeline which is intended to be published has to be converted to publishable instance.
In OpenPype it is done by tagging a clip with our own metadata. Select all clips you wish to convert and menu > OpenPype > Create.

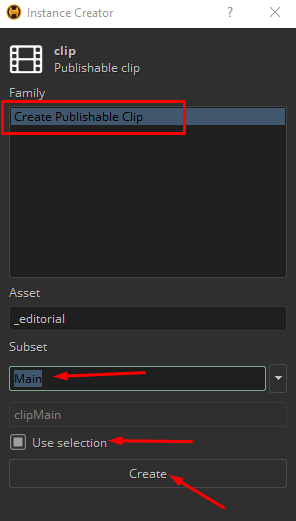
Then chose Create Publishable Clip in Instance Creator dialogue.
Then you can alter Subset name, but this will be changed dynamically and replaces with timeline's track name.
Keep Use selection on.
Hit Create
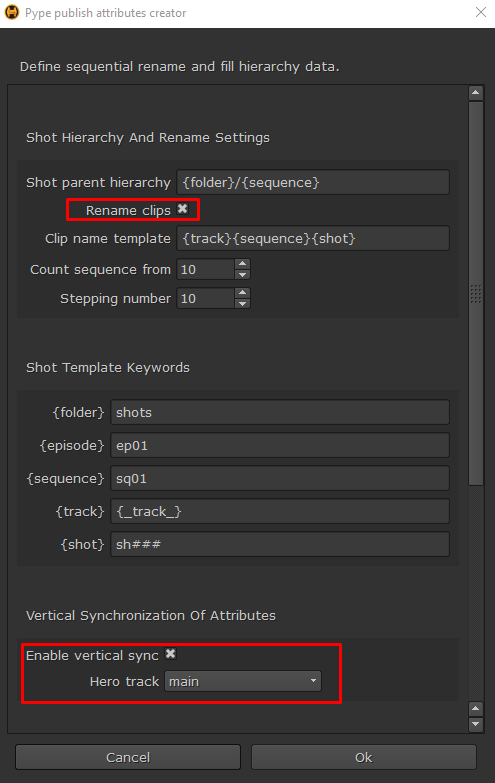
Dialogue Pype publish attributes creator will open. Here you can define instance properties. If you wish to rename clips dynamically during creation then Keep Rename clips ticked.
In case you wish to use multiple elements of shots workflow then keep Enamble vertical sync ticked on and define correct hero track which is holding main plates, this is usually the main track.
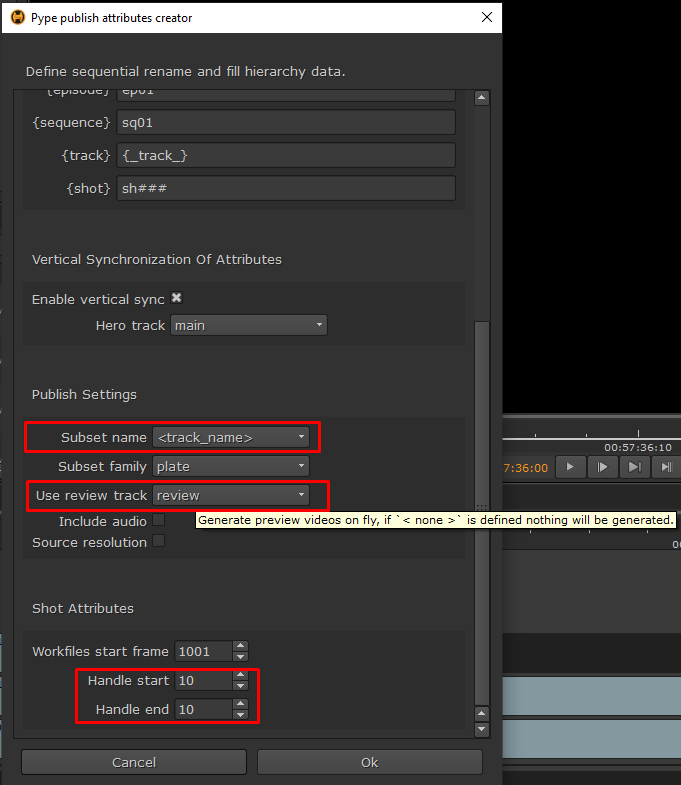
Subset name is created dynamically if <track_name> is selected on Subset name.
I case you wish to publish reviewable video as explained above then find the appropriate track from drop down menu Use review track. Usually named review
Hover above each input field for help.
Handles can be defined here to. In case you wish to have individual clip set differently we recommend to set here the default value and later change those in the created OpenPype tag's metadata under handleStart and handleEnd properties (look below for details)
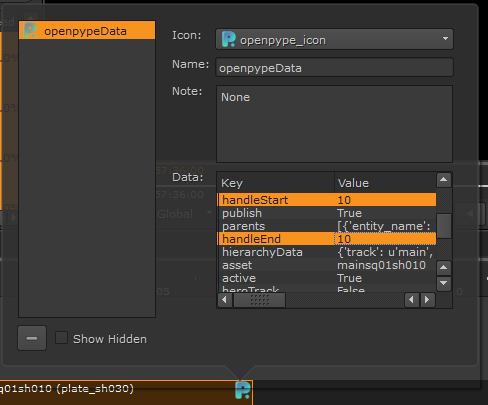
After you hit Ok tags are added to selected clips (except clips in review tracks).
If you wish to change any individual properties of the shot then you are able to do it here. In this example we can change handleStart and handleEnd to some other values.
Publishing Effects from Hiero to Nuke
This video shows a way to publish shot look as effect from Hiero to Nuke.
Assembling edit from published shot versions
Nuke Build Workfile
This is a tool of Node Graph initialisation using a pre-created template.
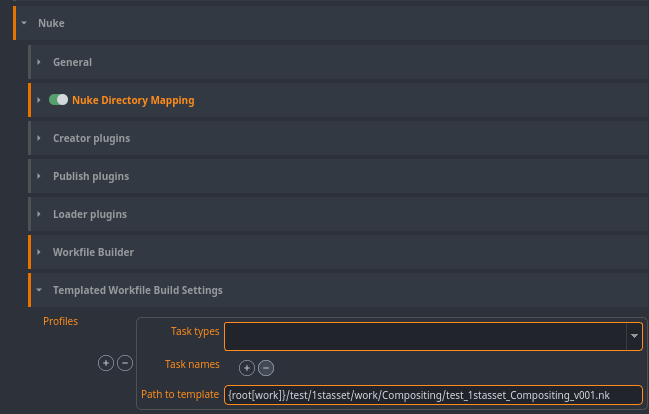
Add a profile
The path to the template that will be used in the initialisation must be added as a profile on Project Settings.
Create Place Holder
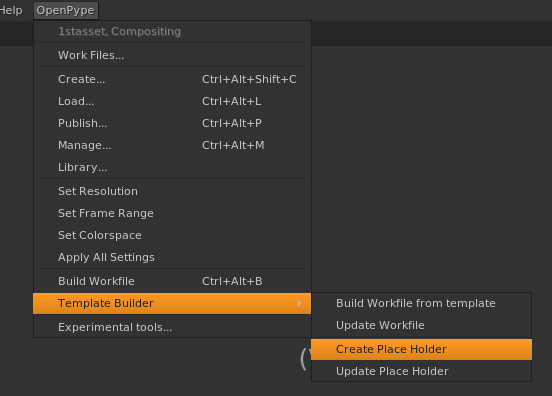
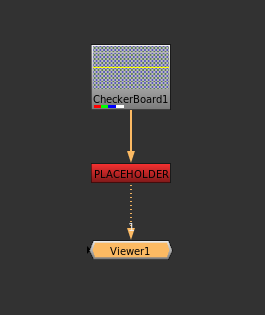
This tool creates a Place Holder, which is a node that will be replaced by published instances.

Result
- Create a red node called
PLACEHOLDERwhich can be manipulated as wanted by using it in Node Graph.
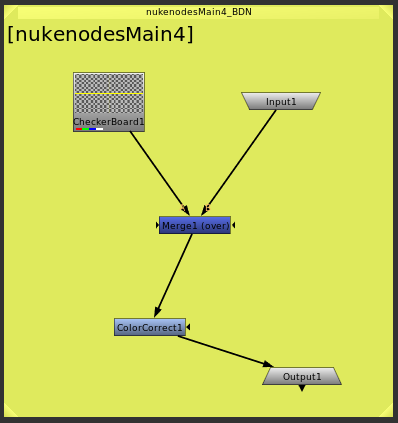
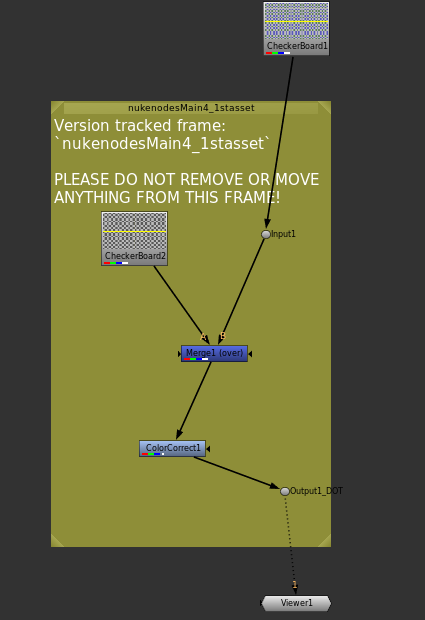
note
All published instances that will replace the place holder must contain unique input and output nodes in case they will not be imported as a single node.
The information about these objects are given by the user by filling the extra attributes of the Place Holder
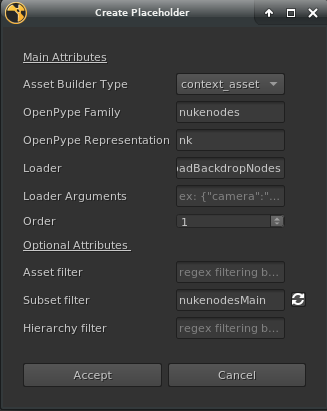
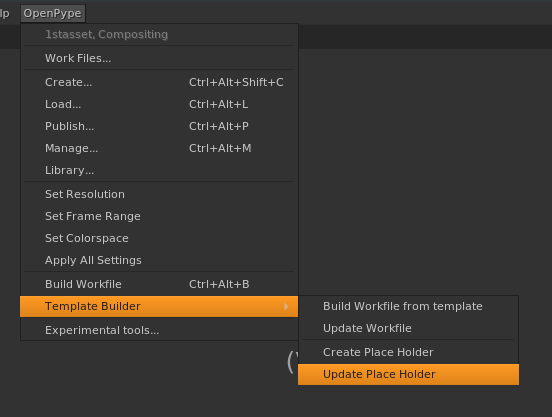
Update Place Holder
This tool allows the user to change the information provided in the extra attributes of the selected Place Holder.
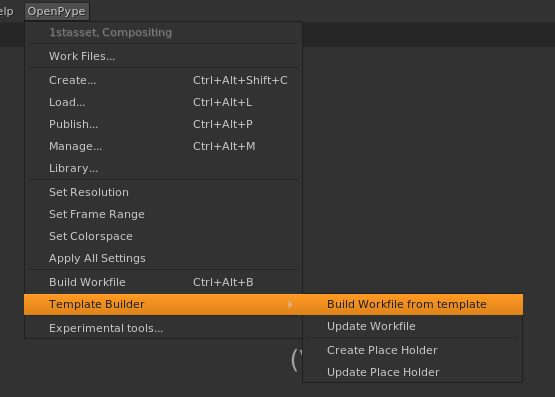
Build Workfile from template
This tool imports the template used and replaces the existed PlaceHolders with the corresponding published objects (which can contain Place Holders too). In case there is no published items with the description given, the place holder will remain in the node graph.
Result
- Replace
PLACEHOLDERnode in the template with the published instance corresponding to the information provided in extra attributes of the Place Holder
note
In case the instance that will replace the Place holder A contains another Place Holder B that points to many published elements, all the nodes that were imported with A except B will be duplicated for each element that will replace B
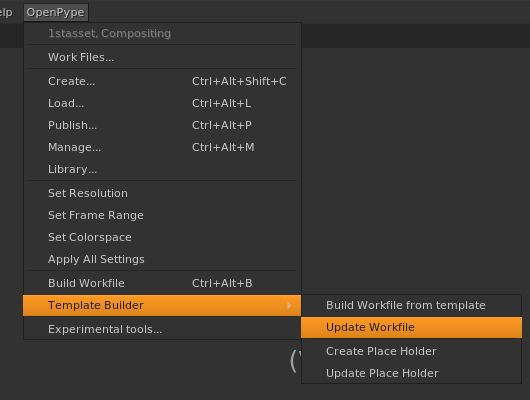
Update Workfile
This tool can be used to check if some instances were published after the last build, so they will be imported.
note
Imported instances must not be deleted because they contain extra attributes that will be used to update the workfile since the place holder is been deleted.